See these? These are the two most treasured recipe cards in my recipe box.

We have the 2-cup recipe...

...which is actually in much better shape than the 3-cup recipe, because we almost always make it in the 3-cup version. The 3-cup version is more stained and faded and would be barely discernible to most eyes.

If I were to lose either one of these, I would cry. I tear up in this moment just imagining that. Sorry, give me a moment....
Ok, better now.
As you continue to read and see the process, you'll understand why we usually make the 3-cup version. It is rather involved, so at the point you've got a low-humidity night and the time and the ingredients assembled, and your candy thermometer at the ready, and your airtight metal cans clean and available, you might as well do the slightly larger version. But it really is worth it, guys! It isn't like most any other peanut brittle you'll ever find out there. I won't buy peanut brittle, and I can usually tell by looking at most peanut brittle that I run across that it just won't be worth the calories.
This. Stuff. Is.
It just is. The texture and flavor and clarity that the amount of butter brings to this version is much more toffee like and makes all the difference in the world. It just does. You have to trust me on this if you're never in the neighborhood to try some. But if you are in the neighborhood around Christmas then by all means stop in to try a piece. Or better yet, live on the edge and make some yourself!
Let me begin by reiterating the low-humidity part. If it is a cloudy day - and I mean even a few puffs of clouds around, don't bother trying to make this. In our area we almost always get at least 1 - 2 cold, clear days or nights in December that are just perfect peanut brittle making weather. I can't speak for other areas, but I can say that Mother and Daddy moved quite a bit when I was growing up, and Mother always found a day or two wherever we lived to make peanut brittle each year, so I have to believe it is possible in many areas of the country.
Also don't attempt this without a candy thermometer. They aren't expensive, but this isn't the kind of candy that you can make using the cold water test.
Are you scared enough yet? Have I made this sound impossible? I don't mean to, but I also don't want to lie to you and tell you "It's easy!" when it honestly just isn't that easy. And there are a lot of factors that can influence how it turns out and how well it stores.
For I am also serious about the airtight metal cans. If you store it in plastic, you've wasted your time and ingredients, too. It's sorta why we stored this year's peanut brittle in this new, pretty can. Peanut brittle is kind of a present to ourselves and our family and friends. Mother would give it as gifts each year to our teachers and Daddy's work associates, and they looked forward to it every year. So a can with a bow on top just seems appropriate. BUT! Even as pretty as the green can with the read bow is, I would not have bought this can if it did not have a tight-fitting lid. I stood in the aisle to open and close it multiple times before putting it in the cart.

Below is the 3-cup recipe. And yes, it is 3 sticks of butta. 3. Count 'em. 1, 2, 3. Added at different times, but there are 3.
And that doesn't count the butter you need for prepping your kitchen counter or other LARGE surface to pour the finished brittle out on to ready for the stretching and pulling part.
Oh, and just for the record, this is the original recipe that uses peanuts and pecans. We made only pecan brittle this year, just because, so the pics won't show peanuts in the mixture, only pecans, but the concept is the same.
Ready? Here we go!
Prepare your surface first before you start the sugar syrup or if you have a helper, one can start the syrup and one can butter the surface. Nay, lather the surface with LOTS of soft butter. You truly cannot over-butter this surface. You can definitely under butter and then you will have quite the cement brittle mess to clean up with heavy, man tools that I don't know the names of. So err on the side of too much butter, and you will all live happily ever after!

I am pretty sure I used more than only that above for a surface about 4' square.

Can you see the butter glistening on the counter? You want to see that glisten...a sort of thick glisten if that makes any sense.
3 c. sugar
1 ½ c. corn
syrup
Put in pan
and stir together. Put on high heat,
cover and bring to boil. Take top off.
Add:
3 c. raw
peanuts
Put in candy
thermometer and stir and cook to 270°.

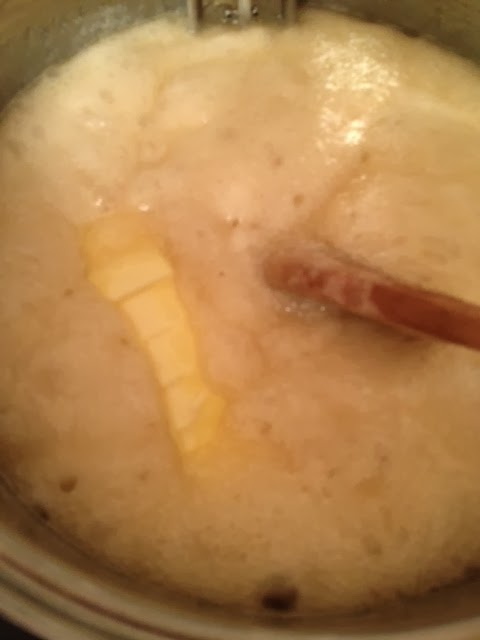
Add:
1 stick of
butter

The temperature will drop as much as 30 degrees when the butter is added. That's ok.
Stir and
cook to 275°.
Add:
1 stick of
butter
Again, the temperature will drop. Stir and
cook to 280°.
Add:
1 stick of
butter

Stir and
cook to 290°.
Add:
2 – 2 ½ c.
pecans. (Since we made pecan brittle only, we added about 5 cups of pecans).

Let
thermometer return to 290° and let go to 294° - 295°. Turn off heat.

Add:
2 t. vanilla
2 t. baking
soda
Stir quickly
and pour out onto well-buttered surface.

Spread and then with metal spatula start stretching and pulling. Cut off and turn over on unbuttered surface.
The stretching and pulling part is the trickiest part and because G and I were both busy doing that and didn't have a photographer around to take pictures or to catch a video, I don't have one for this post. Maybe I will plan better next time! But here are the pieces turned over on the unbuttered surface.

Let cool and store in air tight metal containers – never plastic.
And when it's all packed away, you will have these morsels of yummy goodness as a cook's treat. These are especially wonderful over ice cream!

I wish I could have each of you over sometime to make peanut brittle and get your hands in the butter and stretching goodness. My sister, J, hasn't really seen it done much, because she always lived in a different city than my parents when she was all grown up, but we are hopeful that she can come here around February for her birthday and J-man's birthday and a peanut brittle making demo - complete with lots of photographers around to capture the whole process much better than above!
Christmas. I love Christmas. And peanut brittle - or pecan brittle as the case may be - is one of those connectors to the family and the past for me. Don't worry. My mother would totally approve of the pecan brittle, because she always said the pecans were the best part...that if you ended your piece with a pecan in that bite, you had to have another piece.
And she was right! Thanks for stopping by today!
No comments:
Post a Comment